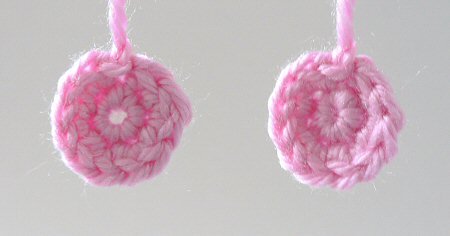
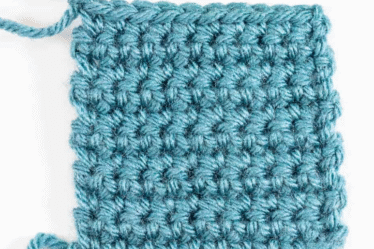
If you want to crochet hats, mandalas, amigurumi, or anything in the round, learning how to make a magic ring (also called a magic circle) is essential. Unlike starting with a chain loop, the magic ring allows you to pull your starting round tight, leaving no hole in the center. In this step-by-step tutorial, you’ll learn how to make a magic ring with ease perfect for beginners looking to elevate their crochet game.
🧵 Why Use a Magic Ring?
The magic ring method creates a tightly closed center when crocheting in the round. It’s especially useful for projects like stuffed animals, coasters, flowers, or granny squares where you don’t want a gap in the middle. It might feel tricky at first, but with a little practice, it quickly becomes second nature.
This technique is a game changer simple, clean, and polished.

✂️ Materials You’ll Need:
-
Yarn (worsted weight recommended for practice)
-
Crochet hook suitable for your yarn (5.0 mm for beginners)
-
Scissors
🪡 Step-by-Step: How to Crochet a Magic Ring
🧵 Step 1: Wrap the Yarn
Wrap the yarn around your fingers once, forming an “X” shape with the tail hanging underneath.
🧵 Step 2: Insert the Hook
Insert your hook under the first strand and grab the second strand (the working yarn) with your hook.
🧵 Step 3: Pull Up a Loop
Pull the yarn through the loop and hold it with your hook. Carefully remove your fingers from the ring while keeping the loop secure.
🧵 Step 4: Chain One (or More)
Chain one (or more depending on your pattern). For single crochet stitches, one chain is enough; for double crochets, chain three.
🧵 Step 5: Work Stitches into the Ring
Crochet the required number of stitches into the loop. Be sure to work over both the ring and the tail of the yarn.
🧵 Step 6: Pull the Tail
Once all stitches are in place, pull the tail tight to close the circle — no hole in the center!
🧵 Step 7: Join or Continue Rounds
You can now join with a slip stitch or continue working in spirals, depending on your pattern.

💡 Pro Tips:
-
Practice with thicker yarn so you can clearly see your stitches.
-
Don’t pull the ring too tight too early — wait until all stitches are inside.
-
Secure your tail well when finishing your project to prevent loosening.

📥 Download the Free PDF
Prefer printed instructions?
📄 Download our free Magic Ring Crochet PDF Guide
🎥 Watch the Magic Ring Tutorial
Need a visual demo?
The magic ring might seem intimidating at first, but it’s a must-have tool for any crocheter working in the round. Once you’ve mastered this technique, you’ll love how clean and professional your projects look right from the first stitch.


