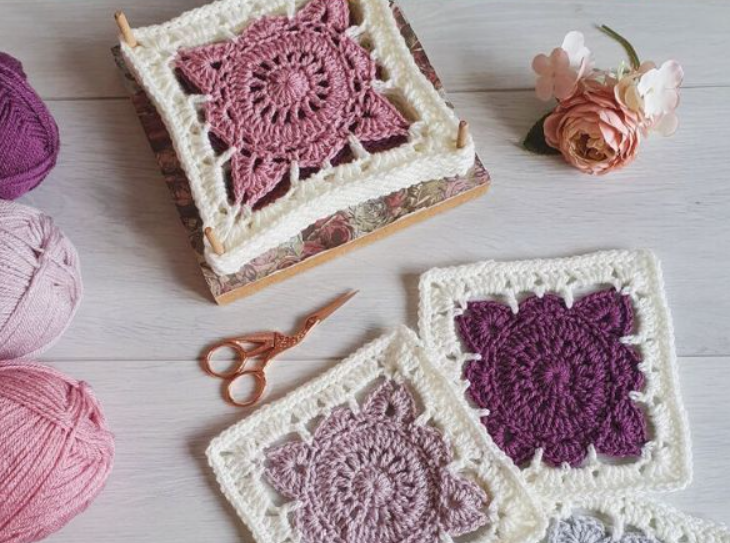
Add a touch of vintage elegance to your next crochet project with the timeless Willow Granny Square Pattern. This beautiful square, measuring 7.5 inches, blends traditional charm with modern appeal through its intricate texture and lacy details. Whether you’re crafting a cozy afghan, a stylish tote, or a delicate table runner, the Willow Granny Square offers endless creative possibilities.
Designed for crocheters of all levels, this pattern is marked as easy making it a fantastic project for beginners looking to expand their stitch knowledge or experienced crafters wanting a relaxing, rewarding make. The square uses basic stitches like single and double crochet, combined with creative shaping to form its signature floral-like motif in the center. Each round builds on the last, transforming the piece from a delicate circle into a structured square with soft, rounded corners.
You’ll need a 5.5mm (US I-9) crochet hook, three yarn colors of your choice, and basic tools like a tapestry needle and stitch marker to get started. The detailed instructions guide you through color changes, shaping, and finishing, so you can confidently create a beautiful square every time.
Pattern Information
-
Finished Size: 7.5″ Square
-
Hook Size: US I (9) / 5.5 mm
-
Skill Level: Easy
Other Materials Needed
-
Stitch Marker
-
Scissors
-
Tapestry Needle
Abbreviations
-
ch – Chain
-
st(s) – Stitch(es)
-
sl st – Slip Stitch
-
sc – Single Crochet
-
dc – Double Crochet
-
sk – Skip
-
sps – Space(s)
-
pm – Place Marker
-
rep – Repeat
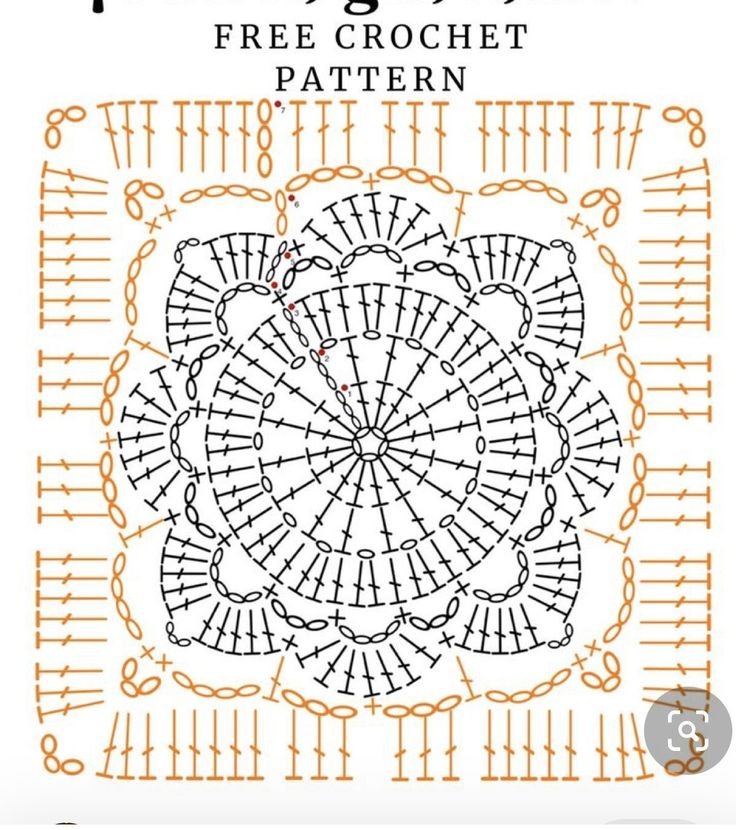
Willow Granny Square Instructions
Round 1 (Color A)
Start with a magic ring (or ch 4 and sl st to the first ch to form a ring).
Ch 3 (counts as a dc), pm in the 3rd ch if needed.
Work 15 dc into the ring.
Join with a sl st to the 3rd ch.
(16 dc sts)
Round 2 (Color A)
Ch 4 (counts as a dc + ch 1), pm in the 3rd ch.
[1 dc, ch 1] in every st around.
Join with a sl st to the 3rd ch.
Fasten off Color A.
(16 dc + ch1 sps)
Round 3 (Color B)
Fasten on Color B in any dc st.
Ch 3 (counts as a dc), pm in the 3rd ch.
2 dc in ch1 sp, [1 dc in dc, 2 dc in ch1 sp]—rep around.
Join with a sl st to the 3rd ch.
(48 sts)
Round 4 (Color B)
Ch 1, 1 sc in same st, pm on first sc.
[ch 5, sl st to 5th ch, sk 2 sts, 1 sc in next st, ch 2, sk 2 sts, 1 sc in next st, ch 3, sk 2 sts**, 1 sc in next st, ch 2, sk 2 sts, 1 sc in next st]
Rep the full repeat ending your last sequence at **.
Join with a sl st to the first sc.
Round 5 (Color B)
Sl st into next ch5 sp.
Ch 3 (counts as dc), pm in the 3rd ch.
[4 dc, ch 3, 5 dc] in same ch5 sp, 1 sc in ch2 sp, 5 dc in ch3 sp, 1 sc in ch2 sp*.
[5 dc, ch 3, 5 dc] in ch5 sp.
**Rep from * ending your last repeat at .
Join with a sl st to the 3rd ch.
Fasten off Color B.
Round 6 (Color C)
Fasten on to any ch3 sp.
Ch 1, [1 sc, ch 3, 1 sc] in same ch3 sp, pm on first sc.
Ch 5, 1 dc in next sc, ch 3, sk 2 dc, 1 sc in next dc, ch 3, sk 2 dc, 1 dc in next sc, ch 5 *.
[1 sc, ch 3, 1 sc] in next ch3 sp.
**Rep from * ending last repeat at .
Join with sl st to the first sc.
Round 7 (Color C)
Sl st into next ch3 sp.
Ch 3 (counts as 1 dc), pm in the 3rd ch.
[2 dc, ch 2, 2 dc] in same ch3 sp, 5 dc in ch5 sp, 3 dc in next two ch3 sps, 5 dc in next ch5 sp*.
[3 dc, ch 2, 3 dc] in next ch3 sp.
**Rep from * ending last repeat at .
Join with a sl st to the 3rd ch.
Round 8 (Color C)
Ch 1, 1 sc in every st (pm on first sc) around.
Work [2 sc, ch 2, 2 sc] in each corner ch2 sp.
Join with a sl st to the first sc.
Round 9 (Color C)
Ch 1, 1 sc in every st (pm on first sc) around.
Work 3 sc in each corner ch2 sp.
Join with a sl st to the first sc.
🌟 Below, you’ll find the complete Willow Granny Square pattern available in PDF format.
This downloadable version is perfect for printing or saving for offline use as you craft your next masterpiece.
Willow Granny Square Pattern PDF
Finishing Touches
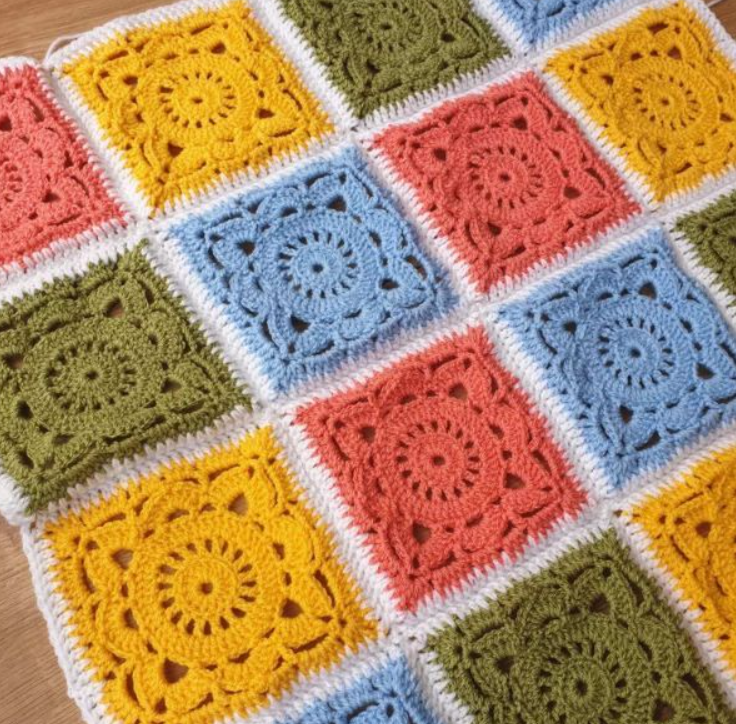
Once you’ve completed your desired number of Willow Granny Squares, use a tapestry needle to weave in any loose ends. For a polished finish, block your squares so they lay flat and even. Then comes the fun part assembling your squares into a cozy blanket, elegant throw, cushion cover, or anything your heart desires!
Whether you’re gifting your creation or keeping it close to home, these charming squares are sure to impress with their delicate design and timeless beauty.