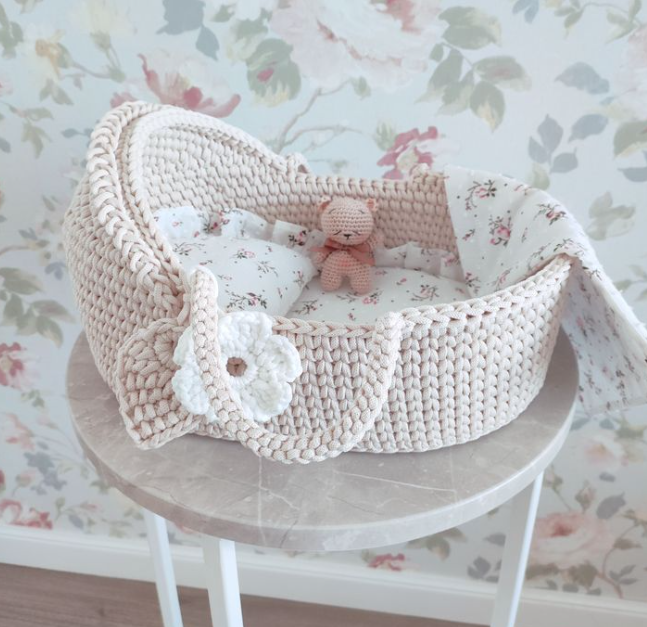
Creating a crochet Moses basket for babies is one of the most meaningful projects a crocheter can make. It combines beauty, functionality, and love into a practical item that can be used daily during a newborn’s first months. I always find that projects like this become treasured keepsakes something families hold onto long after babyhood has passed.
This pattern is designed to produce a sturdy, comfortable, and modern baby Moses basket using premium t-shirt yarn. The thick yarn provides structure and durability, while the spiral construction ensures a smooth, seamless finish. Whether you’re making this basket as a baby shower gift, for your own nursery, or as part of your handmade collection on My Sweet Crafts, it’s a project that truly stands out.
The instructions below follow a professional, easy-to-read structure suitable for confident beginners and experienced crocheters alike, helping ensure a beautiful and safe finished result.
Skill Level: Intermediate
Project Type: Baby Accessory / Nursery Essential
Finished Size: Base: Approximately 45 cm long x 30 cm wide (oval)
Materials
4 balls of premium t-shirt yarn
Size 9 crochet hook
Stitch markers (optional but helpful)
Yarn needle for finishing
Construction Notes
The basket is worked in a spiral and in rows.
The base is crocheted first in an oval shape.
The sides are then built upward without increasing.
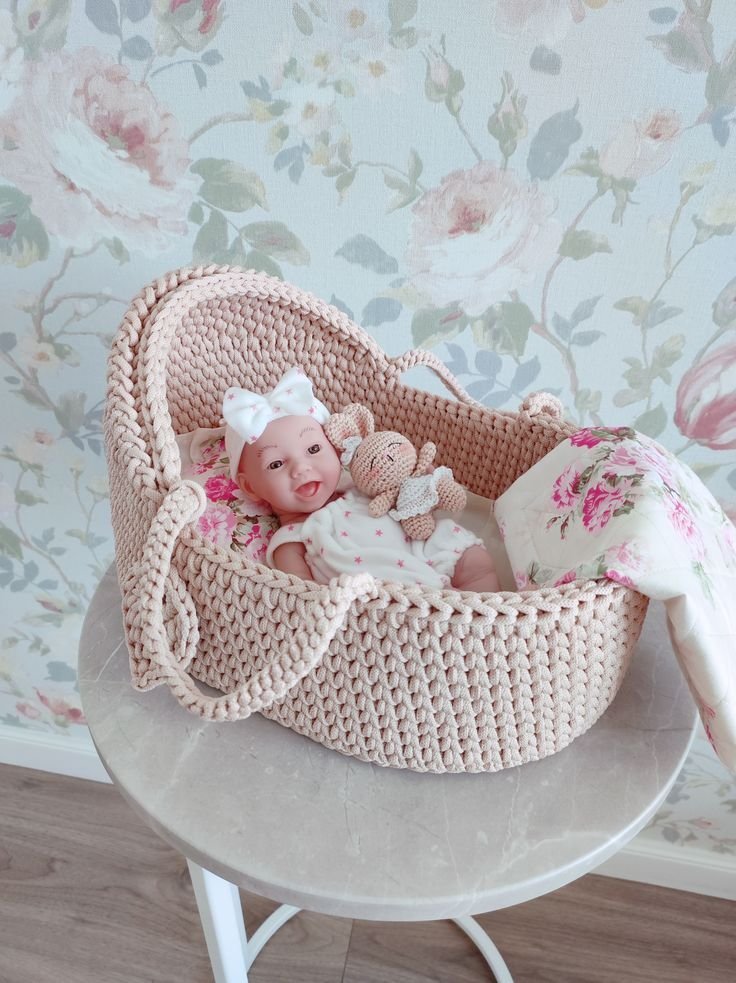
Handles and bonnet (hood) are added at the end.
This design creates a structured and supportive baby basket.
Stitches Used
- sc = single crochet in the center of the stitch of the previous round
- Ch = chain
- Dup = work 2 stitches in 1 stitch of the previous round
- Leng = skip 1 stitch from the previous round
- dc = double crochet
- dec / meng = decrease
Base Instructions
The base is oval and measures 45 cm long x 30 cm wide.
Work in a spiral. Cast on 13 chains and begin working in the 2nd chain from the hook.
Round 1: Work 11 sc, 5 sc in the next chain, 10 sc, 2 dup. (30)
Round 2: Work 12 sc, 3 dup, 12 sc, 3 dup. (36)
Round 3: Work 12 sc, 1 dc, 1 sc 3 times, 12 sc, 1 dc, 1 sc 3 times. (42)
Round 4: Work 12 sc, 2 sc, 1 dc 3 times, 12 sc, 2 sc, 1 dc 3 times. (48)
Round 5: Work 12 sc, 1 dc, 3 sc 3 times, 12 sc, 1 dc, 3 sc 3 times. (54)
Round 6: Work 12 sc, 4 sc, 1 dc 3 times, 12 sc, 4 sc, 1 dc 3 times. (60)
Round 7: Work 12 sc, 1 dc, 5 sc 3 times, 12 sc, 1 dc, 5 sc 3 times. (66)
Round 8: Work 12 sc, 6 sc, 1 dc 3 times, 12 sc, 6 sc, 1 dc 3 times. (72)
Round 9: Work 12 sc, 1 dc, 7 sc 3 times, 12 sc, 1 dc, 7 sc 3 times. (78)
Round 10: Work 12 sc, 8 sc, 1 dc 3 times, 12 sc, 8 sc, 1 dc 3 times. (84)
Round 11: Work 1 sc in each stitch of the previous round. (84)
Tip:
If you notice the work starting to distort, stop increasing in one round and keep increasing in the next.
Basket Sides
Once the base is finished, continue working without increasing for 9 rounds.
- In the first round, work into the back loop of the stitch to form the edge.
- In the following rounds, continue working the same as the base.
- The edge should appear on the right side of the work.
Forming the Handles
In the 8th round, work as follows:
34 sc
ch 8
skip 5 stitches of the previous round
36 sc
ch 8
skip 5 stitches of the previous round
4 sc
Next Round (9th Round)
34 sc
8 sc around the chain space
36 sc
8 sc around the chain space
4 sc. Finish off.
Bonnet (Hood)
Work in straight rows over the 36 stitches between the handles. When you reach the end of each round, cut the yarn so you always work on the right side of the project.
Rounds 1–4
Work 36 single crochet stitches.
Round 5
Chain 1
11 single crochet stitches
decrease
12 single crochet stitches
decrease
11 single crochet stitches
(34)
Round 6
Chain 1
10 single crochet stitches
decrease
5 single crochet stitches
decrease
6 single crochet stitches
decrease
10 single crochet stitches
(31)
Round 7
Chain 1
8 single crochet stitches
decrease
6 single crochet stitches
decrease
6 single crochet stitches
decrease
8 single crochet stitches
(28)
Row 8
1 ch
11 sc
1 decrease
4 sc
1 decrease
11 sc
(26)
Row 9
1 ch
5 sc
1 decrease
4 sc
1 decrease
4 sc
1 decrease
4 sc
1 decrease
5 sc
(22)
Row 10
1 ch
6 sc
1 decrease
4 sc
1 decrease
3 sc
1 decrease
6 sc
(19)
Row 11
1 ch
5 sc
1 decrease
3 sc
1 decrease
3 sc
1 decrease
5 sc
(16)
Round 12
1 ch
4 sc
1 decrease
2 sc
1 decrease
3 sc
1 decrease
4 sc
(13)
Round 13
1 ch
3 sc
1 decrease
1 sc
1 decrease
1 sc
1 decrease
1 sc
1 decrease
3 sc
(9)
Round 14
Work 9 stitches together.
Finish off, hiding the ends.
Finishing Touch
Work one round of single crochet around the bonnet edge to conceal and smooth the edges for a polished, professional finish.
You can also add:
- A soft mattress insert
- Cotton lining fabric
- Decorative edging
- Leather or reinforced handles
These optional additions can elevate the basket’s appearance and usability, especially if you plan to gift or sell your handmade item.
Safety Note
This crochet Moses basket is intended for supervised use only. Always place the basket on a flat, stable surface and never carry the baby inside the basket by the handles.
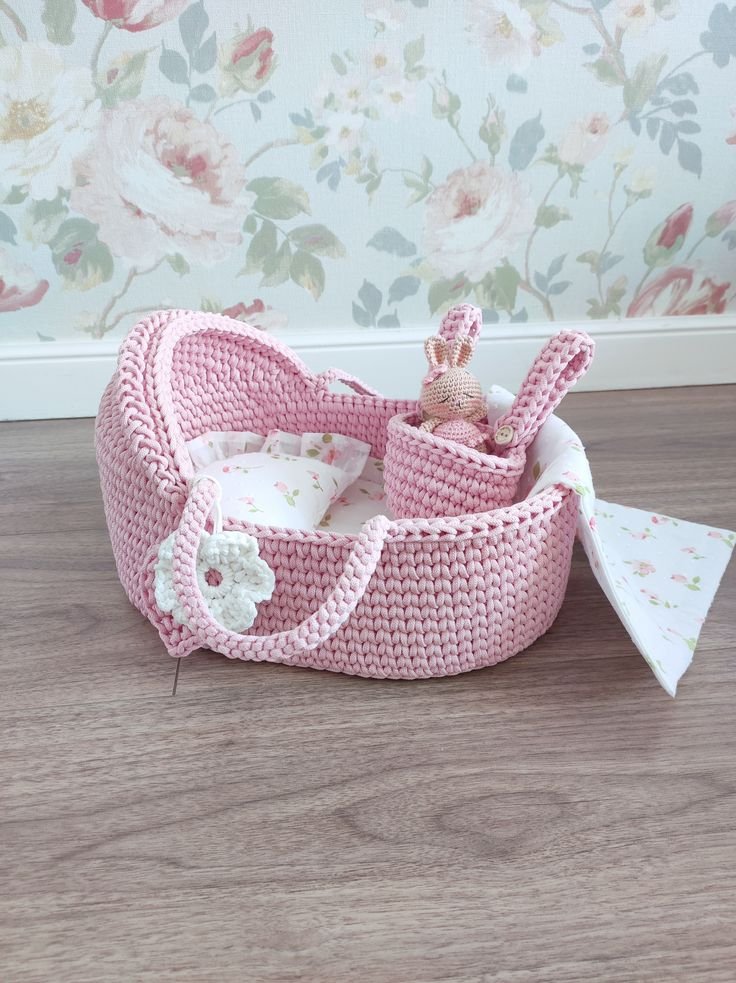
A handmade crochet Moses basket is more than just a nursery accessory it’s a heartfelt project that reflects care, creativity, and craftsmanship. I love how this pattern balances structure and softness, making it both practical and beautiful. It’s the kind of project that quickly becomes a favorite, whether displayed in a nursery or passed down as a cherished keepsake.
On My Sweet Crafts, patterns like this continue to inspire makers who enjoy creating meaningful items for babies and families. With sturdy materials and careful stitching, your finished basket will be a cozy, handmade space for a precious new arrival.