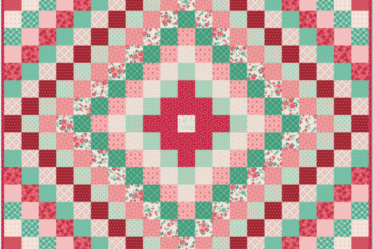
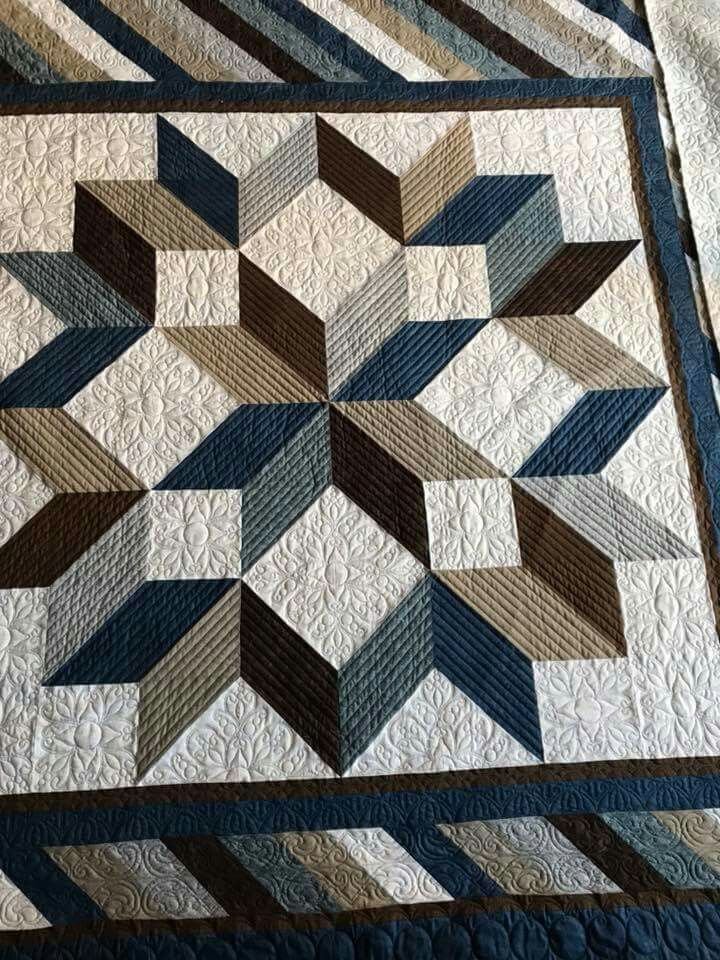
The Carpenter Star Quilt Pattern is one of the most iconic and beloved quilt block designs. Known for its bold geometric layout and dramatic starburst effect, this quilt creates a stunning centerpiece that instantly captures attention. The Carpenter Star is perfect for quilters who enjoy traditional designs with a modern, vibrant twist.
This quilt pattern features a large medallion star at the center, surrounded by coordinating borders that frame the design beautifully. The finished quilt is a square throw that works wonderfully as a sofa blanket, decorative bed quilt, or even a wall hanging.
One of the best things about this project is how versatile it is. By simply changing the fabric colors or prints, you can create completely different looks from soft vintage styles to bold modern quilts. At the end of this article, you’ll find a free PDF pattern that includes the full cutting layout and diagrams to help guide you through the entire project.

Finished Quilt Size
Approximately 66″ x 66″ square throw quilt.
Fabric Requirements
You will need four main fabrics:
-
3/4 yard dark blue fabric
-
3/4 yard dark pink fabric
-
3/4 yard medium pink fabric
-
2 3/4 yards background fabric
Additional materials:
-
4 yards backing fabric
-
Quilt batting (at least 72″ x 72″)
-
1/2 yard binding fabric
-
Fabric marking pen or pencil
Fabric Selection Tips
The Carpenter Star works best when using three bold prints for the star design and a contrasting background fabric. Choosing a strong background helps the star stand out clearly and highlights the geometric shapes of the block.
Great color combination ideas include:
-
Navy, coral, and peach with a white background
-
Burgundy, cream, and gold for a classic quilt
-
Teal, mustard, and gray for a modern look
-
Pastel tones for a soft cottage-style quilt
Cutting Instructions
From Dark Blue Fabric
-
4 squares – 7″ x 7″
-
4 squares – 6 1/2″ x 6 1/2″
-
20 squares – 3 1/2″ x 3 1/2″
-
4 rectangles – 3 1/2″ x 6 1/2″
From Dark Pink Fabric
-
12 squares – 7″ x 7″
-
24 squares – 3 1/2″ x 3 1/2″
From Medium Pink Fabric
-
12 squares – 7″ x 7″
-
24 squares – 3 1/2″ x 3 1/2″
From Background Fabric
-
16 squares – 7″ x 7″
-
16 squares – 6 1/2″ x 6 1/2″
-
12 strips – 3 1/2″ x 42″ (for borders)
Making Half Square Triangles (HSTs)
The Carpenter Star quilt relies heavily on half square triangle units to create the star points.
-
Draw a diagonal line across the wrong side of each 7″ background square.
-
Place the background square right sides together with a colored fabric square.
-
Sew 1/4″ away from each side of the diagonal line.
-
Cut along the line and press open to create two HST units.
-
Trim each unit to 6 1/2″ square.
You will create the following units:
-
20 medium pink / background HSTs
-
12 dark pink / background HSTs
-
8 dark blue / dark pink HSTs
-
4 dark pink / medium pink HSTs
Assembling the Carpenter Star
Lay out the blocks on a design wall or table following the classic Carpenter Star arrangement. The quilt center is made by combining:
-
44 half square triangle units
-
4 dark blue squares
-
16 background squares
Arrange these pieces into eight rows, then sew the rows together to form the center medallion of the quilt.
Adding the Borders
Inner Border
Piece together background fabric strips and cut:
-
2 strips – 3 1/2″ x 48 1/2″ (for the sides)
-
2 strips – 3 1/2″ x 54 1/2″ (for top and bottom)
Attach these strips around the quilt center.
Pieced Border
The decorative border uses small squares of the three main fabrics arranged in a repeating pattern. This adds color and frames the Carpenter Star beautifully.
Sew the pieced border strips and attach them to the sides, then the top and bottom.
Outer Border
Add the final background border to complete the quilt top. The finished border should measure approximately:
-
60 1/2″ for the side borders
-
66 1/2″ for the top and bottom borders
Finishing the Quilt
-
Create a quilt sandwich using the quilt top, batting, and backing fabric.
-
Baste the layers together using pins, spray, or fusible batting.
-
Quilt as desired using straight-line or crosshatch quilting.
-
Bind the quilt with your preferred binding method.
Free Carpenter Star Quilt Pattern PDF
If you’d like the complete step-by-step pattern with diagrams and layout illustrations, download the full tutorial below:
📄 Download the Free PDF Pattern
The PDF includes detailed cutting charts, diagrams, and border assembly instructions to make the quilting process even easier.